Table of Contents
Home / Blog / Mobile Development
Flutter Widgets 101: What They Are, How They Work, and Why They Matter
by
December 19, 2025

by
December 19, 2025
Hey there, Flutter devs (and soon-to-be devs)!
Ever wondered why Flutter is so fast, flexible and easy to work with, the answer is simple, it is made of widgets. Flutter widgets are the small components that constitute your entire app, from text and icons on one hand and on the other hand screens.
Think of them as digital Lego pieces, you stack, style, and combine them to bring your UI ideas to life. It doesn’t matter whether you are building a basic login page or an end-to-end eCommerce application, but the art of working with widgets is what would make your Flutter practice go above and beyond the beginner level.
This article will break down the meaning behind Flutter widgets, discuss the difference between stateless and stateful widgets, give some real world examples, and give some pro tips on how to organize your UI like an expert. Ready to start thinking in widgets? Let’s jump in.
What Are Widgets?
To begin with the question itself, what are widgets in Flutter?
In the Flutter world, widgets are everything. They specify the appearance and behavior of your app, from the most basic text label as well as a complete screen design. Every widget is a component of your interface and informs Flutter of how that component ought to look due to its existing configuration and data.
The thing is that it is quite interesting how Flutter handles such widgets internally. Whenever a change occurs such as when a button is pressed, or a new message received, Flutter has been engineered to update only the parts of the screen that are affected, rather than redrawing the entire screen. This makes it a smooth, fast and incredibly efficient experience.
Related Read: A Successful Business’s Guide to Flutter App Development
Widgets can be considered to be small building blocks that can be reused, repositioned and configured to create virtually any user interface imaginable. And, with the huge Flutter library of ready-made widgets, you do not need to start over again to build beautiful, responsive apps: you already have a toolkit that you can use to build apps with ease.
Types of Widgets in Flutter
In further explaining the Flutter app development process, one of the first things you will learn is that all your interface, even a small icon, or a whole screen is constructed by means of widgets. However, not every widget works in the same manner. In Flutter they can be classified into two broad categories, namely, Stateless and Stateful widgets. The distinction between them is important and understanding it will enable the creation of interactive high-performing applications.
Stateless Widgets
A stateless widget is not complicated, it does not change. Once created, the process of re-creating the widget is identical, except you have to start all over again. They are useful in those elements of your application that do not need to dynamically update such as labels, icons, or headers.
As an example, imagine a product detail screen of a shopping application. Stateless widgets can be used to show the product name and description because both are identical in every item.
Here’s a quick example:
Code:
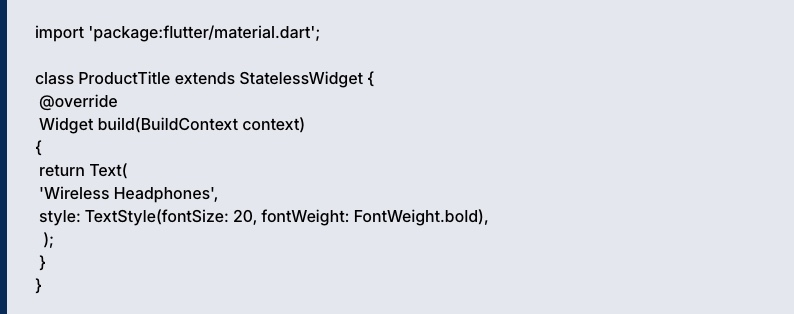
import ‘package:flutter/material.dart’;
class ProductTitle extends StatelessWidget {
@override
Widget build(BuildContext context) {
return Text(
‘Wireless Headphones’,
style: TextStyle(fontSize: 20, fontWeight: FontWeight.bold),
);
}
}
Regardless of the number of times that the app has been rebuilt, that text will not change, and that is precisely what you want with the static content.
Stateful Widgets
Stateful widgets, on the other hand, are everything about change. They are able to update themselves in real time as the user interacts with them or when the data is modified. This makes them ideal in such things as forms, counters, toggles or animations.
Taking the same example of a shopping app. When the user clicks a button on the page, which says “Add to Cart”, the cart icon in the app bar will change to reflect the new item count. That interactive element? It’s powered by a stateful widget.
Here’s how a simple version might look:

Code:
import ‘package:flutter/material.dart’;
class CartCounter extends StatefulWidget {
@override
_CartCounterState createState() => _CartCounterState();
}
class _CartCounterState extends State<CartCounter> {
int _cartCount = 0;
void _addToCart() {
setState(() {
_cartCount++;
});
}
@override
Widget build(BuildContext context) {
return Column(
children: [
Text(‘Items in Cart: $_cartCount’),
ElevatedButton(
onPressed: _addToCart,
child: Text(‘Add Item’),
),
],
);
}
}
Every time the button is pressed, you increase the number and the widget recreates only that part of the UI, and it is effectively and smoothly created. And that is the strength of Flutter, it responds immediately to the variation of state without having to draw the entire screen again.
Read more – How to Estimate Your Flutter App Development Cost
Transform your app’s UI with our expertly crafted Flutter Widgets.
Discover our library of dynamic, responsive, and beautiful components designed for performance.
Common Basic Flutter Widgets and Their Use Cases
In the building of a Flutter app, there are widgets that reoccur, and reoccur, they are the support frame of your app. The knowledge of these basic widgets is the key to the mastering of the Flutter architecture and the development of the clean and flexible UIs.
1. Text Widget
Simple, yet indispensable. Use Text() to display strings anywhere in your app. You can customize font size, weight, color, and even alignment.

Code:
Text(
‘Welcome to Flutter!’,
style: TextStyle(fontSize: 18, fontWeight: FontWeight.w600),
);
Think of it as the words on your app’s “page.”
2. Container Widget
A container is a versatile wrapper that can hold other widgets. You can apply padding, margins, borders, or background colors, and even nest other layout widgets inside it.

Code:
Container(
padding: EdgeInsets.all(12.0),
color: Colors.greenAccent,
child: Text(‘Inside a container!’),
);
It’s like a multi-purpose box, flexible, simple, and essential for arranging your UI.
3. Row & Column Widgets
Need to align things horizontally or vertically? Row and Column are your go-to widgets.
- Row: places children side by side
- Column: stacks children top to bottom

Code:
Row(
mainAxisAlignment: MainAxisAlignment.center,
children: [
Icon(Icons.star, color: Colors.yellow),
Icon(Icons.star, color: Colors.yellow),
Icon(Icons.star, color: Colors.yellow),
],
);
Column(
crossAxisAlignment: CrossAxisAlignment.start,
children: [
Text(‘Line One’),
Text(‘Line Two’),
Text(‘Line Three’),
],
);
These are the “structural beams” of your UI, helping your layout adapt naturally across screens.
4. ListView Widget
Scrollable lists? ListView handles it effortlessly. Perfect for dynamic content like messages, images, or products.

Code:
ListView(
children: [
ListTile(leading: Icon(Icons.map), title: Text(‘Map’)),
ListTile(leading: Icon(Icons.photo), title: Text(‘Photos’)),
ListTile(leading: Icon(Icons.phone), title: Text(‘Phone’)),
],
);
- Pro tip: Use ListView.builder for long lists, it loads items lazily, keeping your app smooth and fast.
By combining Text, Container, Row, Column, and ListView, you can construct almost any UI while staying true to Flutter’s reactive, widget-based architecture. Every widget has a definite purpose in forming a scalable and sustainable app framework.
Read also – Flutter App Development Mistakes You Can’t Afford to Make in 2026
Composing Flutter Widgets: Turning Simple Elements into Complete Interfaces
The most interesting thing about working with Flutter is that it is very easy to create complex UIs by stacking simple widgets. All that you see on the screen, text, icons, buttons or layouts are simply just a widget that can be embedded in another.
Picture it like this, you start with a Container as your base, place a Column inside it to stack elements vertically, and then add Rows, Text, and Buttons wherever they fit best. Only a few lines of code have created a layout that is polished and responsive.
Take a star rating component, for example. You could arrange a Row of star icons, wrap it in a Column with a heading and a “Submit” button, and that’s it, you’ve got a functional, visually appealing feature. It’s all about layering small, reusable widgets to bring your ideas to life.
If you were to look at this setup in the Flutter documentation, you’d see how the framework’s widget tree visually maps out these relationships. It is such an easy yet effective idea and it is what makes Flutter so pleasant to do business with.
Best Practices for Using Flutter Widgets (Expert Insights)
When you start building larger apps in Flutter, it’s easy to let your widget tree grow wild. However, the thing here is, clean and efficient Flutter code most times boils down to the quality of structuring and management of your widgets. With a minimal number of habits, your UI might be better, your code is going to be cleaner, and your future self will be a lot happier.
To begin with, make sure your widgets are small and focused. Each widget would preferably have only a single responsibility such as a list item, or a button click. When you see a widget doing too many things, that is when you realize time to break it down.
Also, lean on stateless widgets whenever possible. They are also lighter, quicker and simpler to test. It is only necessary to have a stateful widget when something in the UI does vary, e.g. responding to user input or updating a counter.
And when you come to the point of managing state, make it as small and centralized as possible. Flutter’s architecture makes it easy to “lift state up”, meaning you place the state in a higher widget so that multiple child widgets can share it. Tools like Provider, Riverpod, or Bloc make this even cleaner.
Another pro tip is to take advantage of Flutter’s built-in widgets before creating custom ones from scratch. Flutter’s standard library is incredibly rich, everything from Container to ListView is designed for performance and consistency.
Let’s say, for instance, you’re working on an eCommerce app for a client, something many teams offering Flutter application development services often do. Rather than creating a single large scale screen widget to be placed on the product page, you could create smaller ones such as one ProductCard widget containing the images, a PriceTag widget with pricing logic, and an AddToCartButton widget interacting with people. The result? The code is cleaner, rebuilds quicker and can be easily updated when the design is subsequently changed.
Tired of generic UI?
Let’s build custom Flutter Widgets that reflect your brand and captivate your users. Get a free project estimate today.
Ready to Build Your Next Flutter App?
Learning Flutter widgets is not only about learning syntax or knowing the components, but it is about knowing how all the elements of your app work together. When you have become accustomed to thinking in widgets, you will start creating user interfaces that are natural, perform with ease and scale.
Whether you are building an easy to-do application or a large scale enterprise platform, it all comes down to widgets that keep you going.
If you’re looking to take your Flutter projects even further, Debut Infotech, one of the leading Flutter app development companies, can help you bring your ideas to life. Our team is highly experienced in developing dynamic and high-performance applications driven by the flexible Flutter widget system, bringing great ideas to life by producing smooth user experiences.
Start your Flutter project with Debut Infotech today and bring your next big idea to life!
Frequently Asked Questions (FAQs)
Q. What Are Widgets in Flutter?
A. In Flutter, widgets are the building blocks of your app’s user interface (UI). Everything you see on the screen, buttons, text, images, layouts is a widget. Even complex designs are made by combining multiple widgets together.
In short, widgets are what make up every part of your Flutter app, from the smallest icon to the entire screen layout.
Q. Which Widget Is Commonly Used for User Input in Flutter?
A. The TextField widget is the most common way to collect user input in Flutter. It’s used whenever you need users to type or edit text inside your app such as entering a name, email, or message.
For more advanced use cases, like handling forms or adding validation rules, Flutter provides the TextFormField widget. It builds on top of TextField and integrates seamlessly with the Form widget, making it easier to manage multiple input fields and validate user data efficiently.
Q. Which Widget Is Used for Layout in Flutter?
A. There isn’t just one widget in Flutter that handles layouts. Instead, Flutter gives you a bunch of layout widgets, each built for a specific purpose.
– For example, you can use Row to place items side by side, Column to stack them vertically, or Stack to layer widgets on top of each other. Container and GridView are also great for creating more structured layouts.
– So rather than having a single “layout widget,” Flutter gives you a flexible set of tools to arrange your UI exactly how you want.
Q. Which Language Does Flutter Use for Widget Programming?
A. Flutter uses the Dart programming language to create widgets and build user interfaces.
Dart is an open-source, client-optimized language developed by Google.
It’s designed to help developers build fast, responsive, and cross-platform applications that run smoothly on mobile, web, and desktop.
Q. What’s the Difference Between main() and runApp() in Flutter?
A. In Flutter, both main() and runApp() are essential, but they handle different jobs.
– The main function is where everything begins. It’s the entry point of every Dart program, the very first function that runs when your app starts. Without it, your code won’t execute at all.
– The runApp() function, on the other hand, is what actually launches your Flutter application. It takes the root widget (usually your app’s main widget) and displays it on the screen.
Think of it this way:
– main() starts the engine,
– runApp() puts your app on the road.
Together, they form the first step in bringing your Flutter app to life.
Our Latest Insights


Leave a Comment